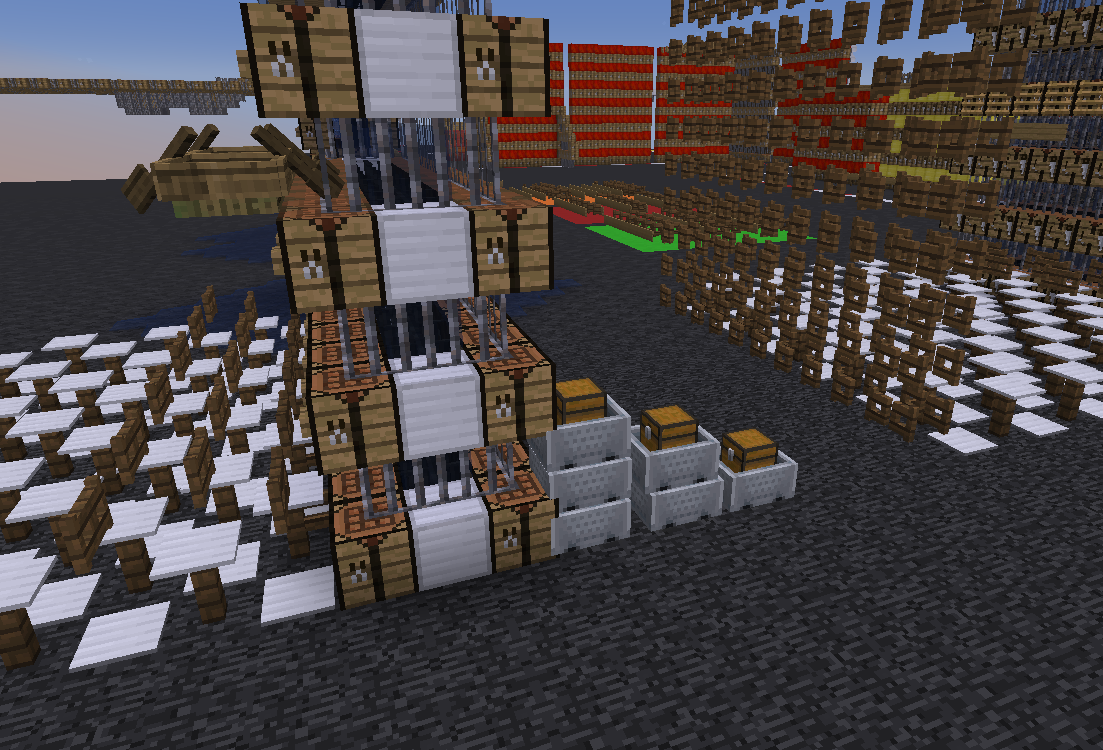
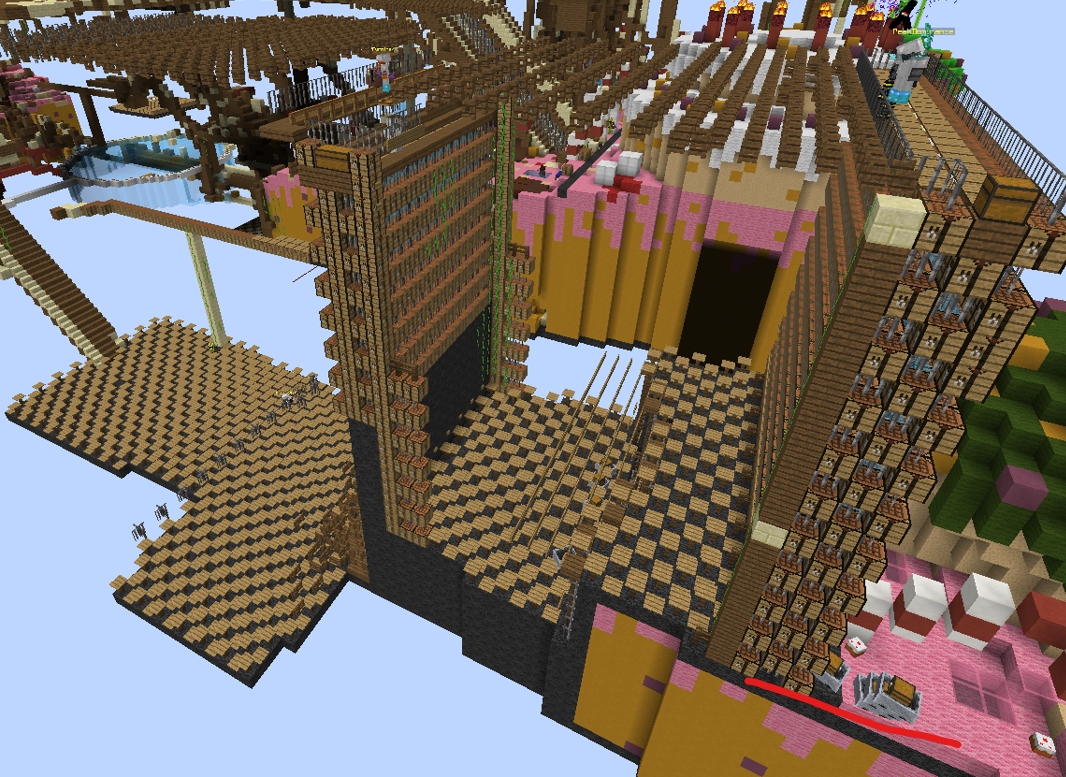
The Defender's Wiki - Front walls
Note that this section is specifically dedicated to front walls, you
won't find snipers' nests here!
Where/how to build a front wall
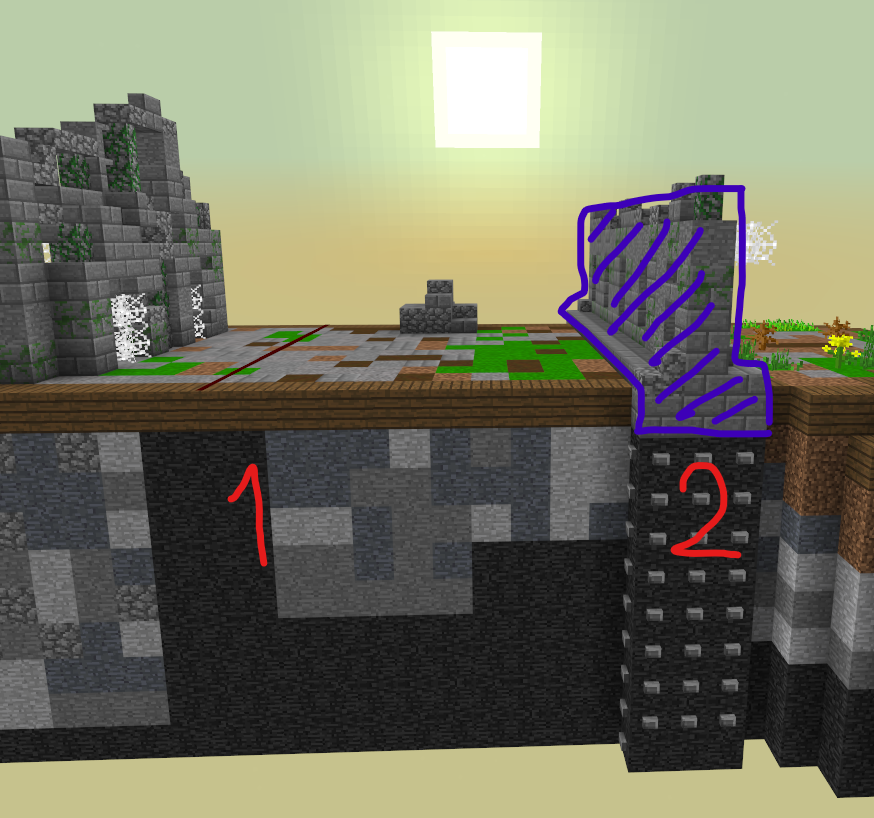
- Usually, maps have two bedrock walls on the woolroom path. The front wall should be built on top of the second one (screenshot below), unless there's only one bedrock wall then just build the front wall on it. If the bedrock walls placement is disadvantageous for defending - don't defend or maybe build the front wall right in front of the woolroom (like a backwall) ignoring the bedrock walls placement
- If there are any blocks on top of the bedrock wall, you have to mine them all. If there's a lot of blocks there, build a back wall first, so the rushers can't just run into a woolroom before you even start building a front wall
- If the bedrock wall is 1 block thick and your front wall is 3 blocks thick (the most common), the middle column of your front wall should be exactly on the bedrock wall; if the bedrock wall is 2 blocks thick, the first column (front one) should stick outside of the bedrock wall and the last and middle column should be exactly above the bedrock wall
- You should stop building front walls 3-4 blocks below the build limit to leave space for the snipers' nest! However this depends on the snipers' nest design you're going to use, some nests are taller, some are shorter
Types of front walls
There's many different types of front walls you can make depending on
the resources you have, your preferences or the map.
All walls in this section follow the best practices (if
possible).
-
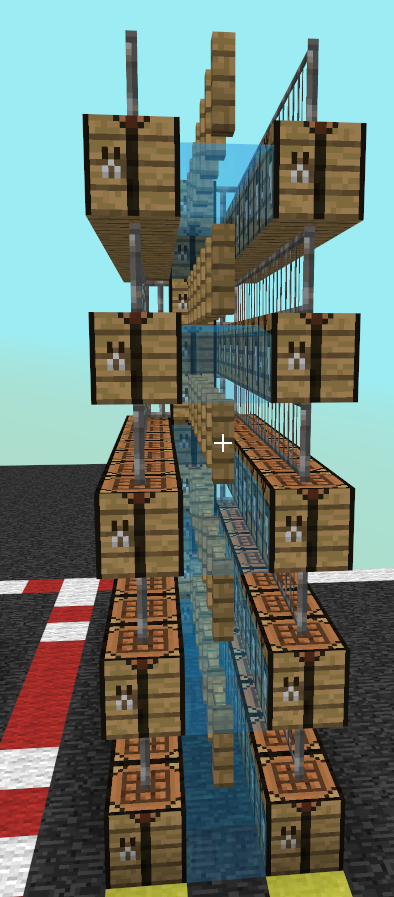
Wood/iron/water wall #1
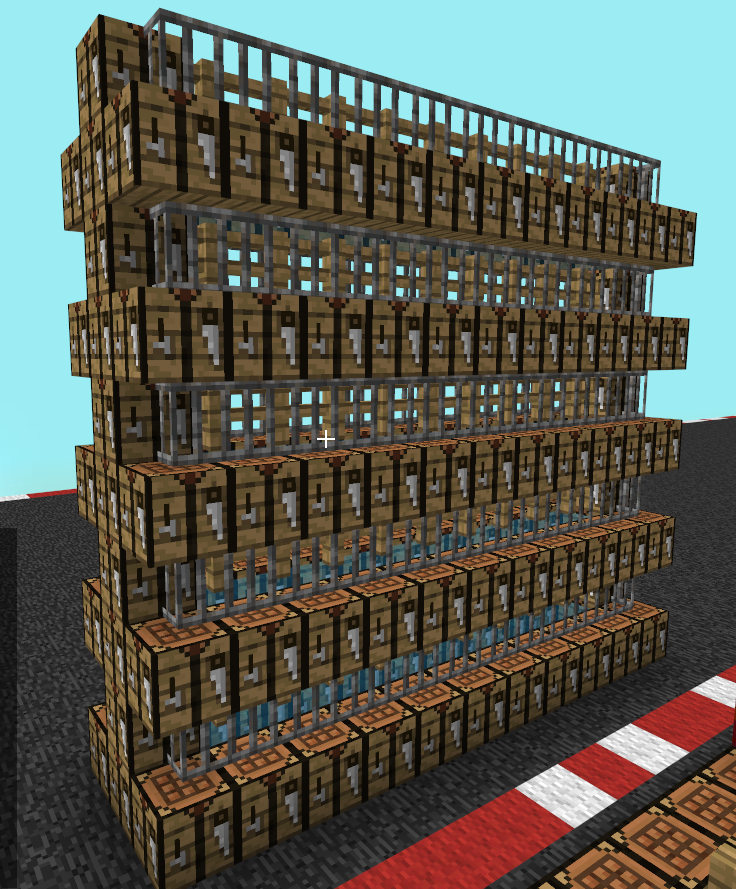
This is in my opinion the most convenient wall to make. You can't drop on the enemies in wall and the insides are visible to rushers, but it is usually enough for a front wall and doesn't take much effort
FunFact: This wall design has been used during the two longest CtW matches on OCC by the winning teams!
Popularized/invented by: Imdad ❤️
Resources needed: Crafting tables, iron bars, fences, 3x water bucket

Images:
Video tutorial:
Explanation:
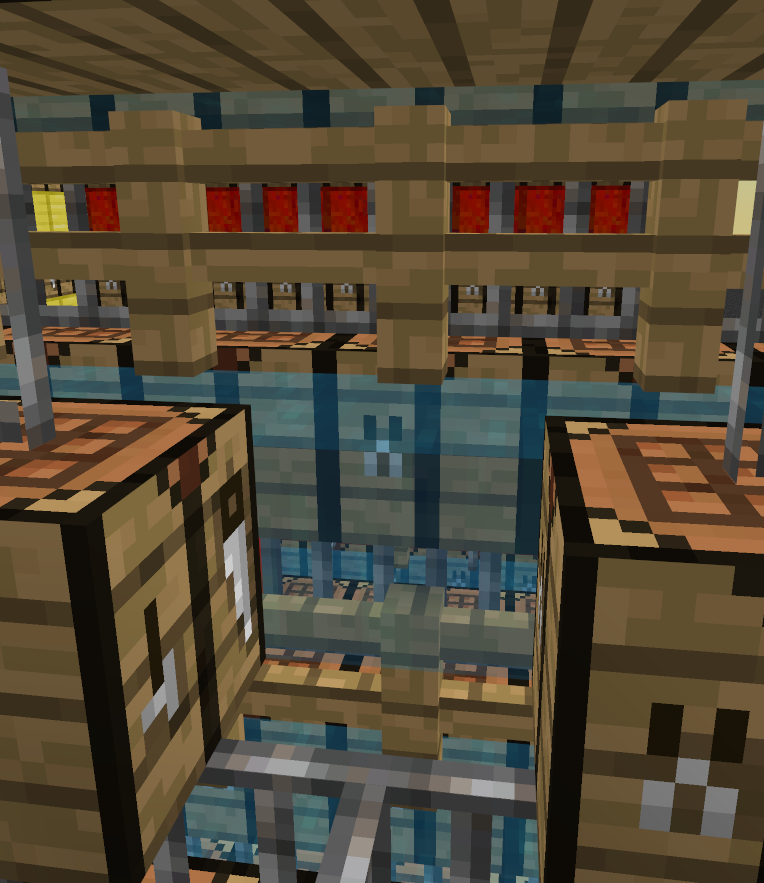
The alternating crafting tables/iron bars pattern makes it harder for rushers to break through the wall, since they have to switch their tools. The water inside of the wall pushes rushers backwards, makes them move slower, makes them mine slower (if their head is in the water) and increases the time needed to break through, because they'll have to block the water. Because the fences are placed between iron bars, they do not connect like they'd to crafting tables, hence it is possible to bow the enemies who managed to get into the wall from the snipers' nest. Also because fences are higher than a regular block the rushers have to break 2 fences, the one on their head level and the one below them to get through
-
Wood/iron/water wall #2
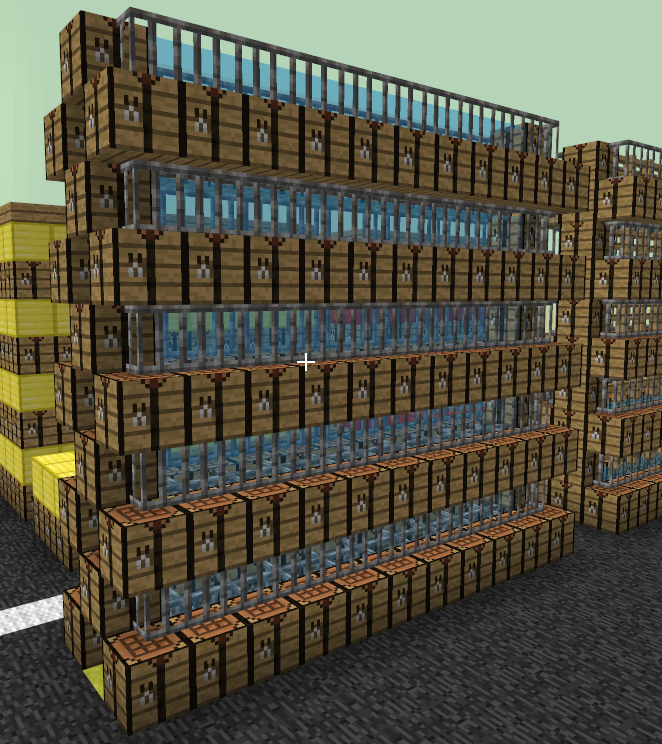
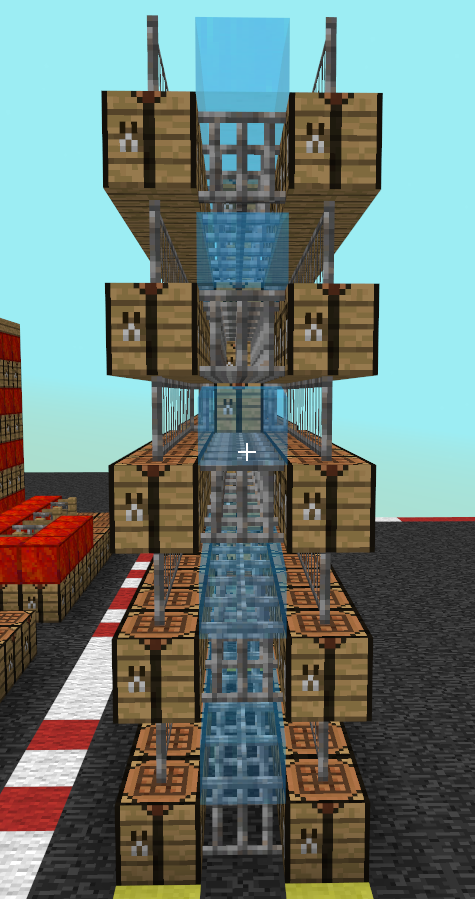
This is a quite basic and probably the most popular type of wall. I don't see any reason why'd you make it instead of the previous wall, the previous wall requires fences, but they're quite easy to craft and they're often in the defence supply chests. It's also the wall that was presented in DoD's wall tutorial
Popularized/invented by: Unknown
Resources needed: Crafting tables, iron bars, 3x water bucket

Images:
Video tutorial:
Explanation:
The alternating crafting tables/iron bars pattern makes it harder for rushers to break through the wall, since they have to switch their tools. The water inside of the wall pushes rushers backwards, makes them move slower, makes them mine slower (if their head is in the water) and increases the time needed to break through, because they'll have to block the water -
Wood/iron wall #1
This wall is a non-water variant of the previous wall
Popularized/invented by: Unknown
Resources needed: Crafting tables, iron bars

Images:
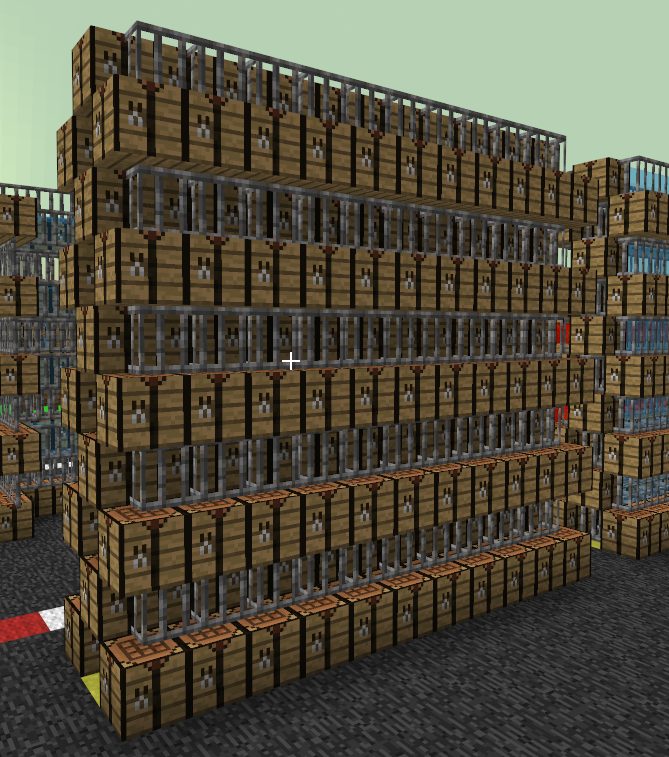
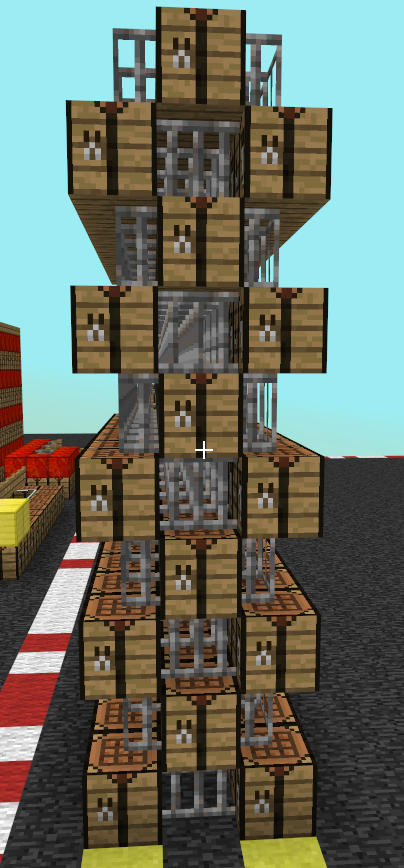
Video tutorial:
Explanation:
The alternating crafting tables/iron bars pattern makes it harder for rushers to break through the wall, since they have to switch their tools -
Anti-boat wall #1
This wall is purely designed to prevent placing boats on its front when it is signed/buttoned. The insides of the wall don't matter, you can use any of the previous ones, I'll use the first wall insides in the tutorial tho (water+fences).
Note that this wall is not commonly used, and there are also other ways to counter boating on the wall, if you're a beginner you should probably start with simpler walls
Popularized/invented by: Gr3ndy ❤️
Resources needed: Crafting tables, iron bars (resources depend on the insides you choose to use, these are the only must-have)
Images:
Even wall width on left, uneven width on right
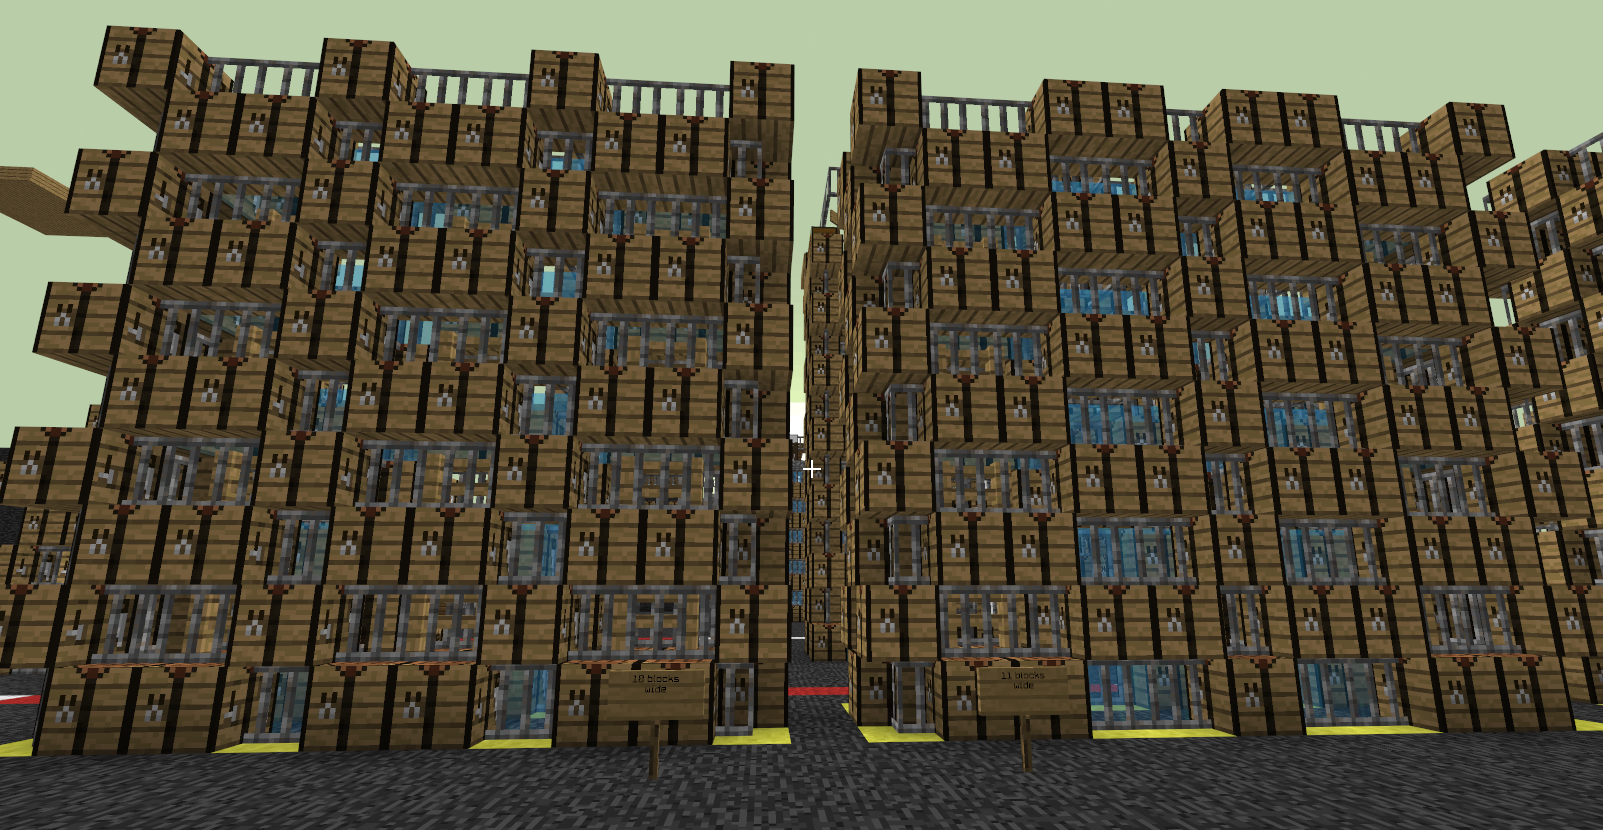
Video tutorial:
Explanation:
Because of this wall's pattern there's not enough space to place a boat where the iron bars are if you sign/button it, since boats need at least 3 blocks space to be placed. To be clear, with normal walls you can only place boats where the iron bars are, you can't place them where the crafting tables are, because they're full blocks
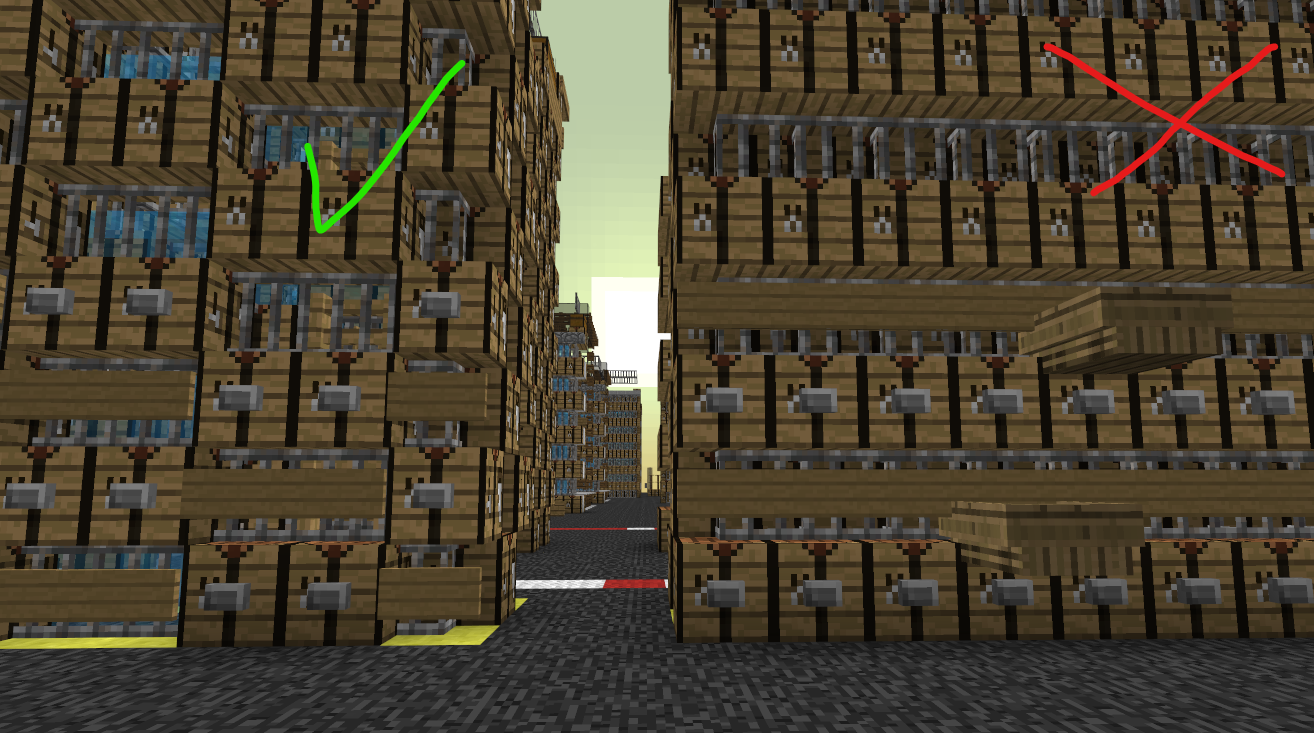
-
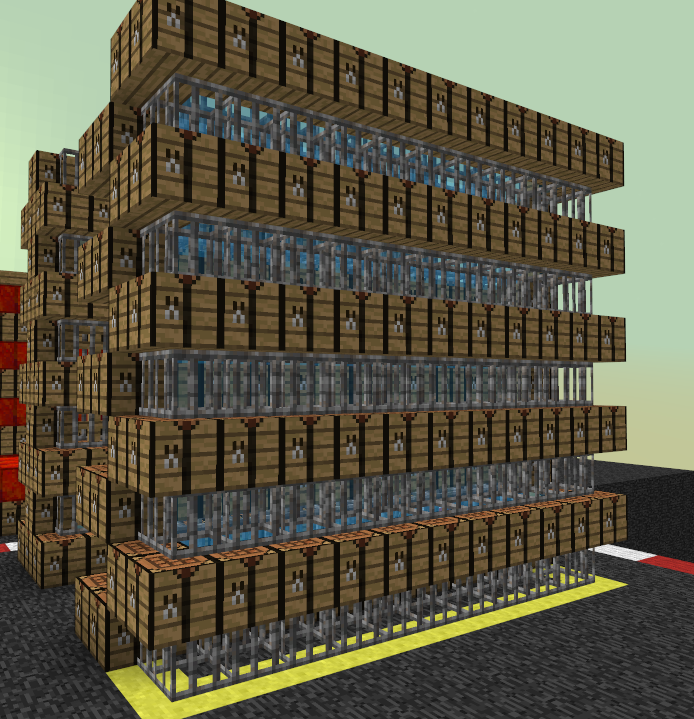
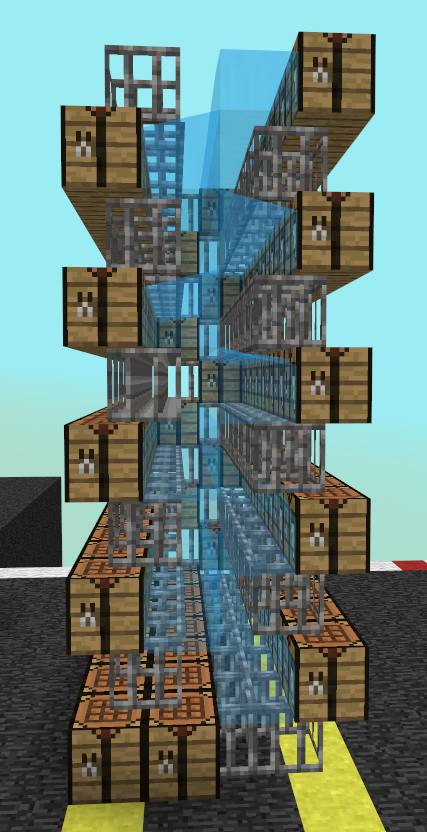
Wood/iron/water 4-block wall #1
Front walls are usually 3 blocks wide, this wall design is a great and innovative Oprad's idea that takes advantage of the wall's thickness being 4 blocks
Popularized/invented by: Oprad ❤️
Resources needed: Crafting tables, iron bars, 3x water bucket
Images:
Video tutorial:
Explanation:
Because of the 4-block wall thickness there's a space in the middle of the wall that allows players to swim in it, meaning the snipers can not only bow the rushers who managed to get into the wall but can also jump on them and kill them using melee weapons. It also takes longer to break through this wall, since it has more layers the rushers have to mine -
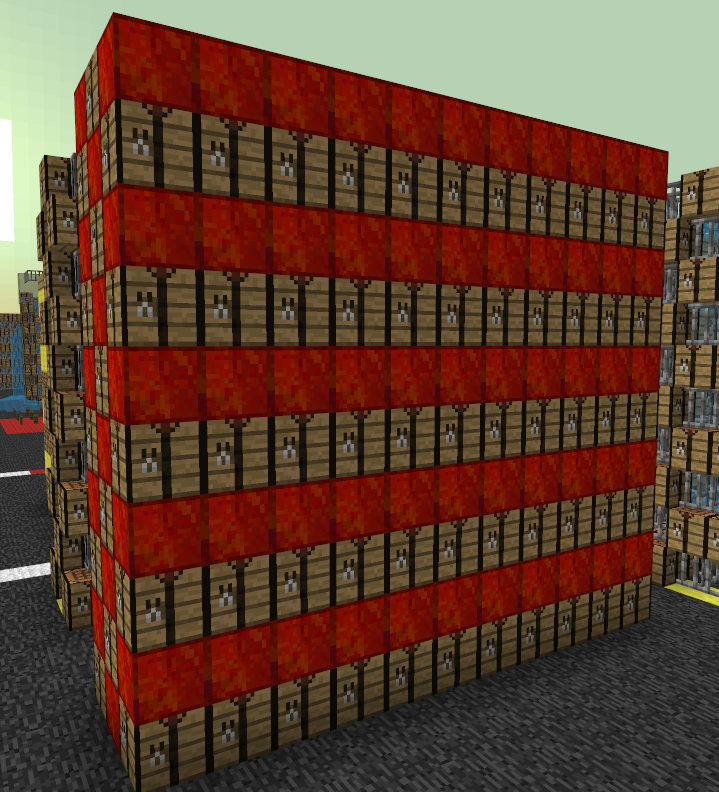
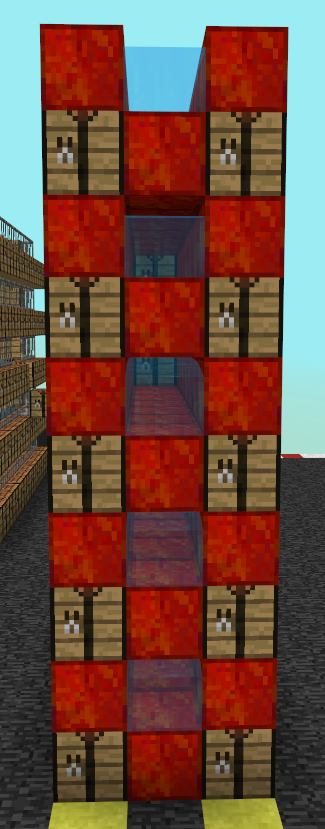
Wood/resource block/water wall #1
This wall is basically the same as Wood/iron/water wall #2, but uses resource blocks instead of iron bars. There is no advantage of using this design over the aforementioned one
Popularized/invented by: Unknown
Resources needed: Crafting tables, resource blocks, 3x water bucket (I'll be using redstone blocks in the tutorial)

Images:
Video tutorial:
Explanation:
The alternating crafting tables/resource blocks pattern makes it harder for rushers to break through the wall, since they have to switch their tools. The water inside of the wall pushes rushers backwards, makes them move slower, makes them mine slower (if their head is in the water) and increases the time needed to break through, because they'll have to block the water -
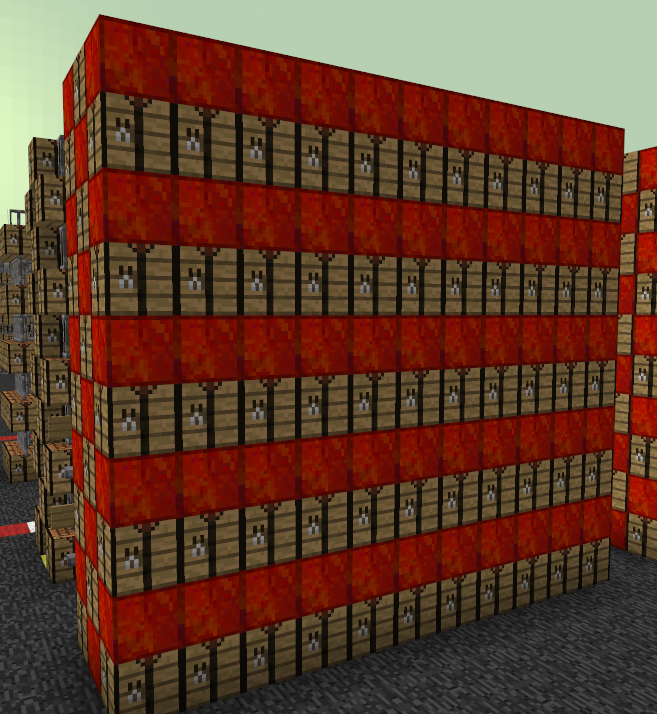
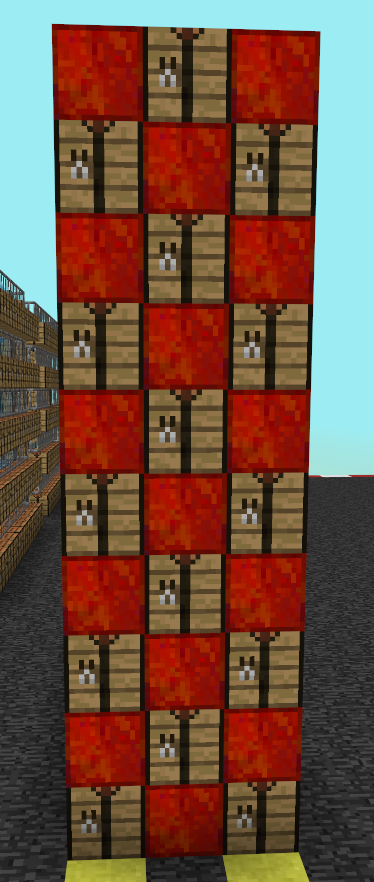
Wood/resource block wall #1
This wall is basically the same as Wood/iron wall #1, but uses resource blocks instead of iron bars. There is no advantage of using this design over the aforementioned one
Popularized/invented by: Unknown
Resources needed: Crafting tables, resource blocks (I'll be using redstone blocks in the tutorial)

Images:
Video tutorial:
Explanation:
The alternating crafting tables/resource blocks pattern makes it harder for rushers to break through the wall, since they have to switch their tools -
Wood/resource block/iron/water wall #1
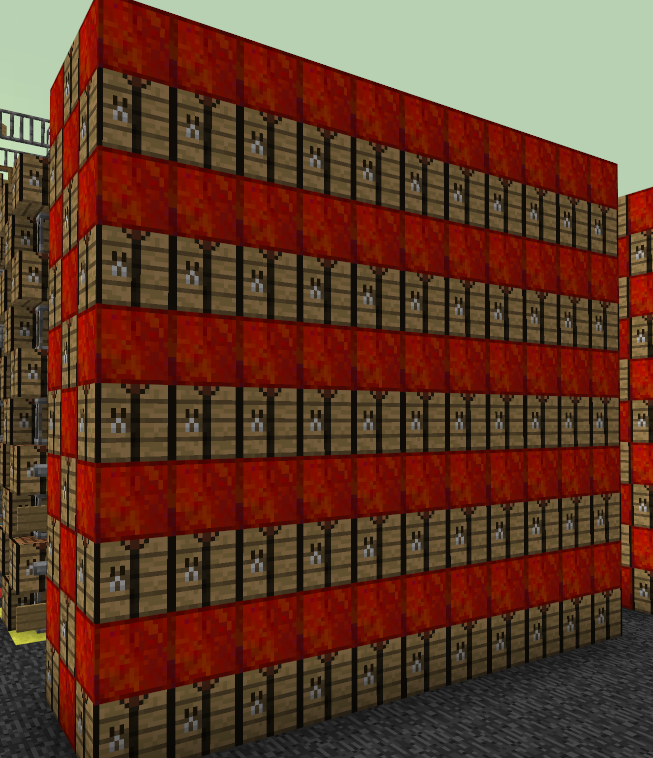
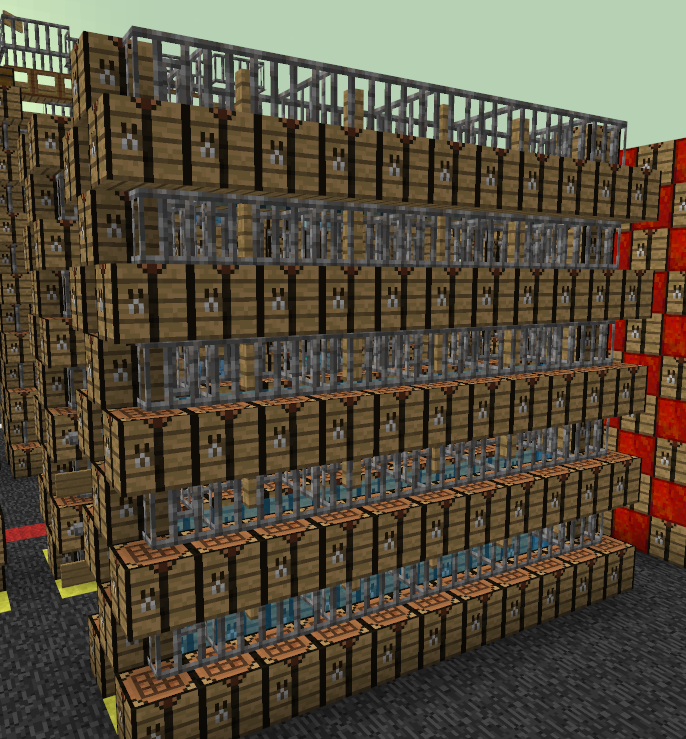
This is a bowable and dropable wall design with resource blocks, which is kind of unusual, because people usually make the Wood/resource block wall #1 wall when they have resource blocks and it's not bowable nor dropable
Popularized/invented by: Unknown
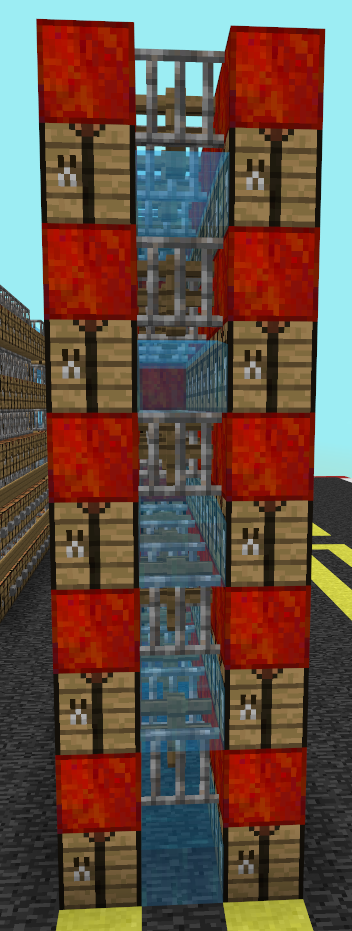
Resources needed: Crafting tables, resource blocks, iron bars, fences (I'll be using redstone blocks in the tutorial, but it can be any resource block or even iron bars!)

Images:
Video tutorial:
Explanation:
The alternating crafting tables/resource blocks pattern makes it harder for rushers to break through the wall, since they have to switch their tools. The water inside of the wall pushes rushers backwards, makes them move slower, makes them mine slower (if their head is in the water) and increases the time needed to break through, because they'll have to block the water. Because the fences are placed between iron bars, they do not connect like they'd to crafting tables, hence it is possible to bow the enemies who managed to get into the wall from the snipers' nest. Also because fences are higher than a regular block the rushers have to break 2 fences, the one on their head level and the one below them to get through. It is also possible to drop/jump on the rushers who are inside of the wall, because of the insides pattern, thanks to which the fences and iron bars do not connect leaving a space in which a player can fit and swim.
One disadvantage of this wall is that the insides contain iron bars, meaning if the rushers try to break through where the iron bars are they won't have to switch their tools nor break 2 iron bars like they'd have to with fences, because iron bars are 1 block tall. Therefore it is not advised to use iron bars instead of resource blocks, because iron bars are see-through and the rushers will be able to see where the insides have iron bars -
Wood/resource block/water wall #2
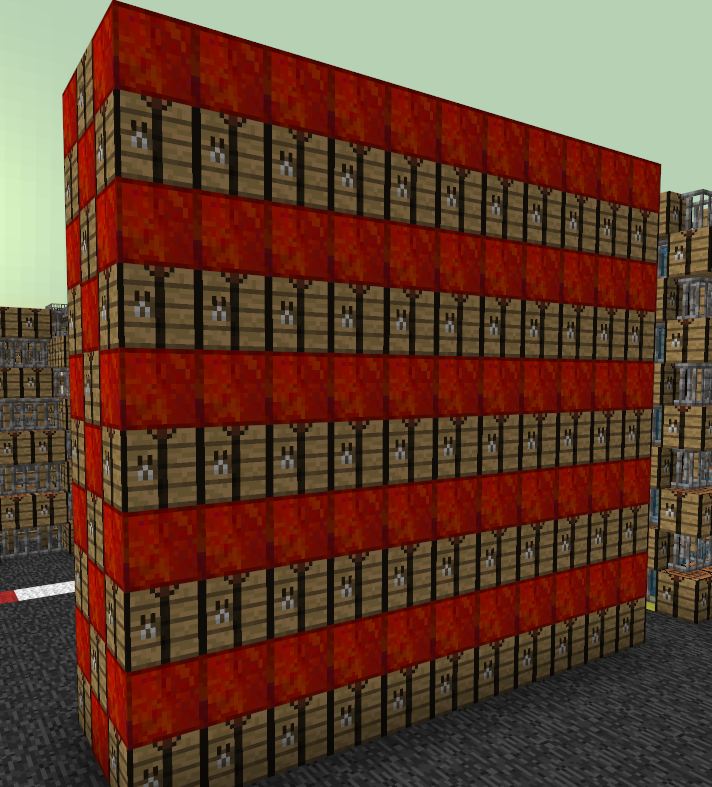
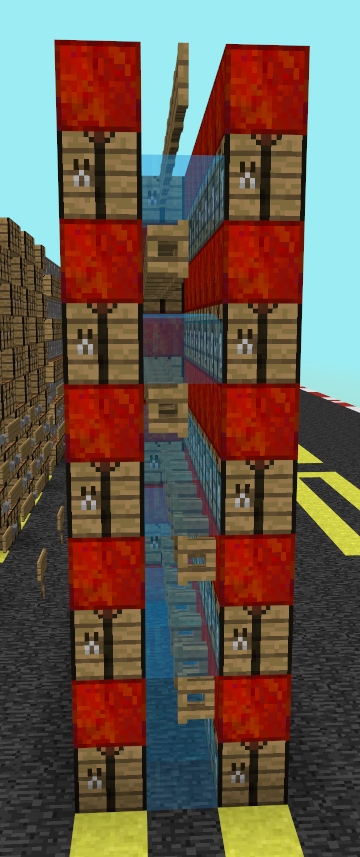
This is a bowable and kind of dropable wall design with resource blocks, which is once again a bit unusual, because people usually make the Wood/resource block wall #1 wall when they have resource blocks and it's not bowable nor dropable
Popularized/invented by: Me!
Resources needed: Crafting tables, resource blocks, some building blocks, fence gates (I'll be using redstone blocks in the tutorial, but it can be any resource block or even iron bars!)

Images:
Video tutorial:
Explanation:
The alternating crafting tables/resource blocks pattern makes it harder for rushers to break through the wall, since they have to switch their tools. The water inside of the wall pushes rushers backwards, makes them move slower, makes them mine slower (if their head is in the water) and increases the time needed to break through, because they'll have to block the water. Because of the fence gates inside, the snipers can bow enemies, as well as drop on them to melee kill them. I've said in the wall description that it is "kind of dropable", because you can also close the fence gates while building and it'd be quite a bit harder, since you'd have to open the fence gates one by one if you wanted to drop -
Confusion wall #1
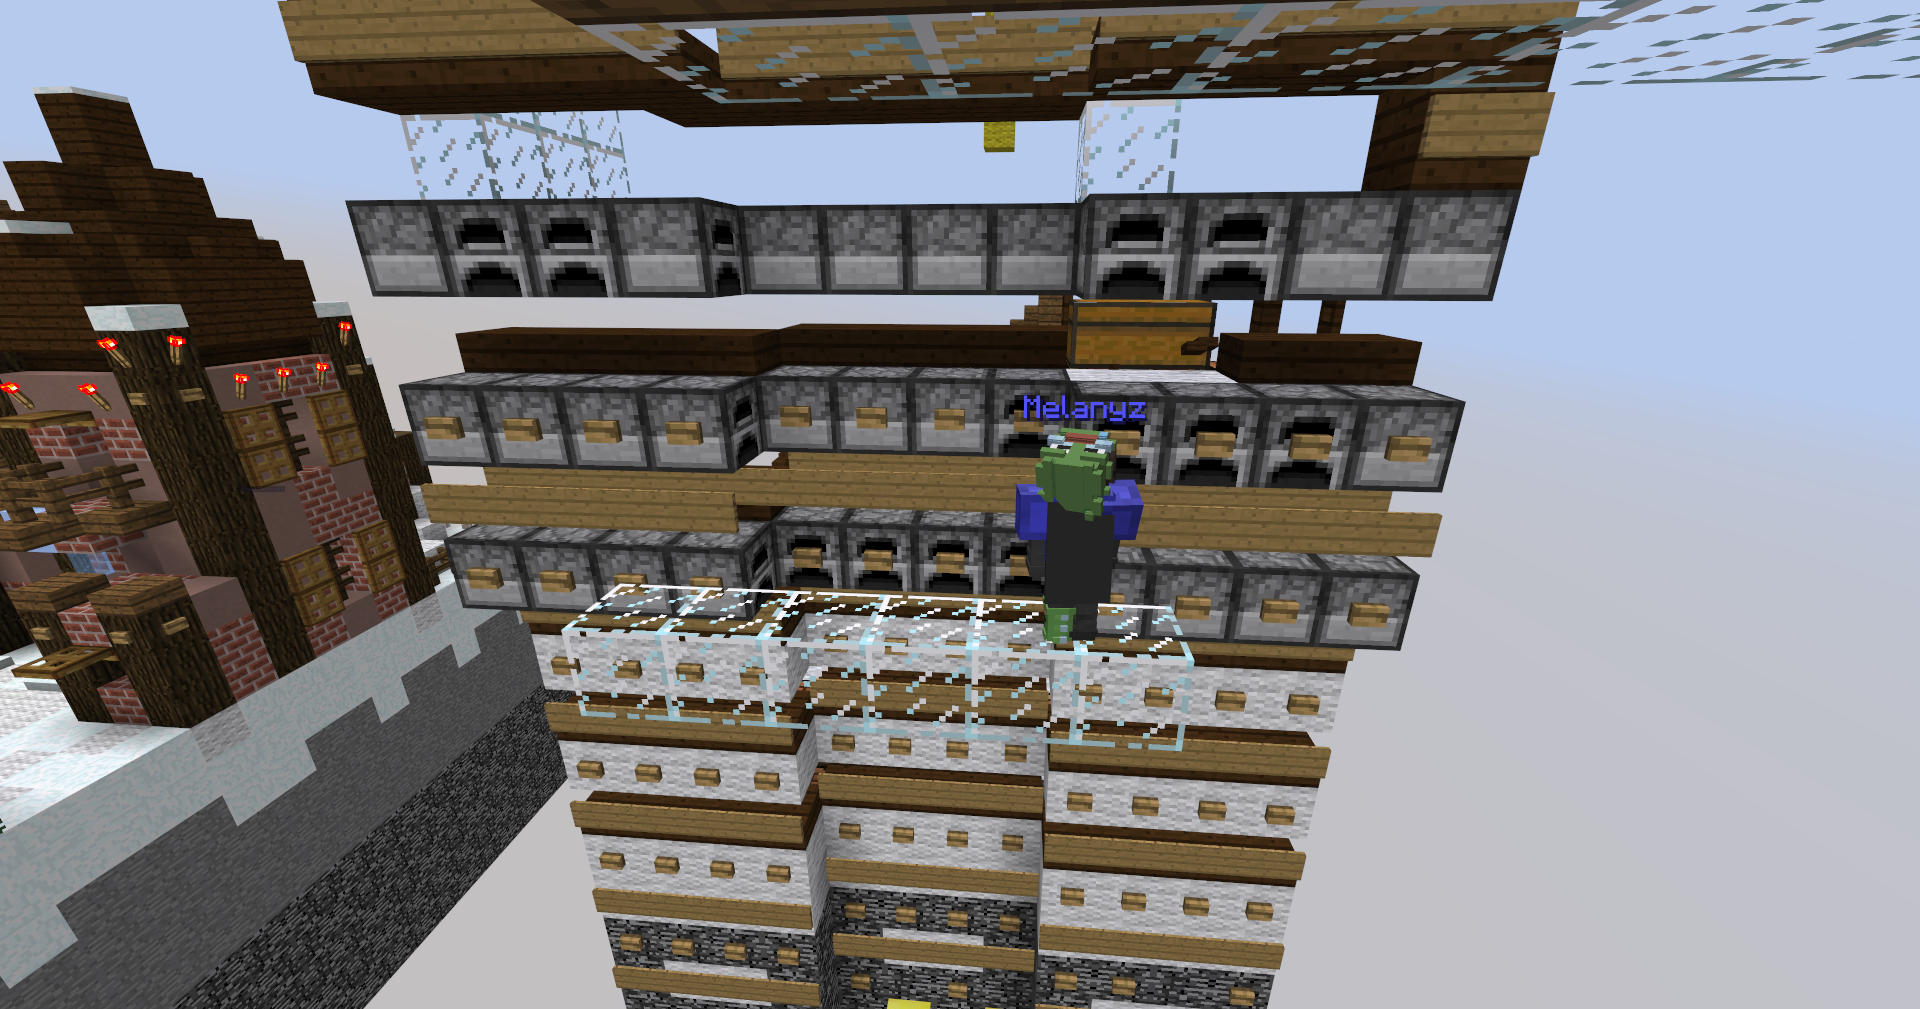
A abstract wall design invented on December 23rd 2024 around 6PM GMT by an unknown defender. My investigation to figure out who's the inventor of this wall was not fruitful in its results. I've tried to convince Brottweiler, whom was online at the time, to check the logs, but he refused. He also said: "I did nothing and it was here when I joined"
Popularized/invented by: Unknown
Resources needed: As seen below
Images:
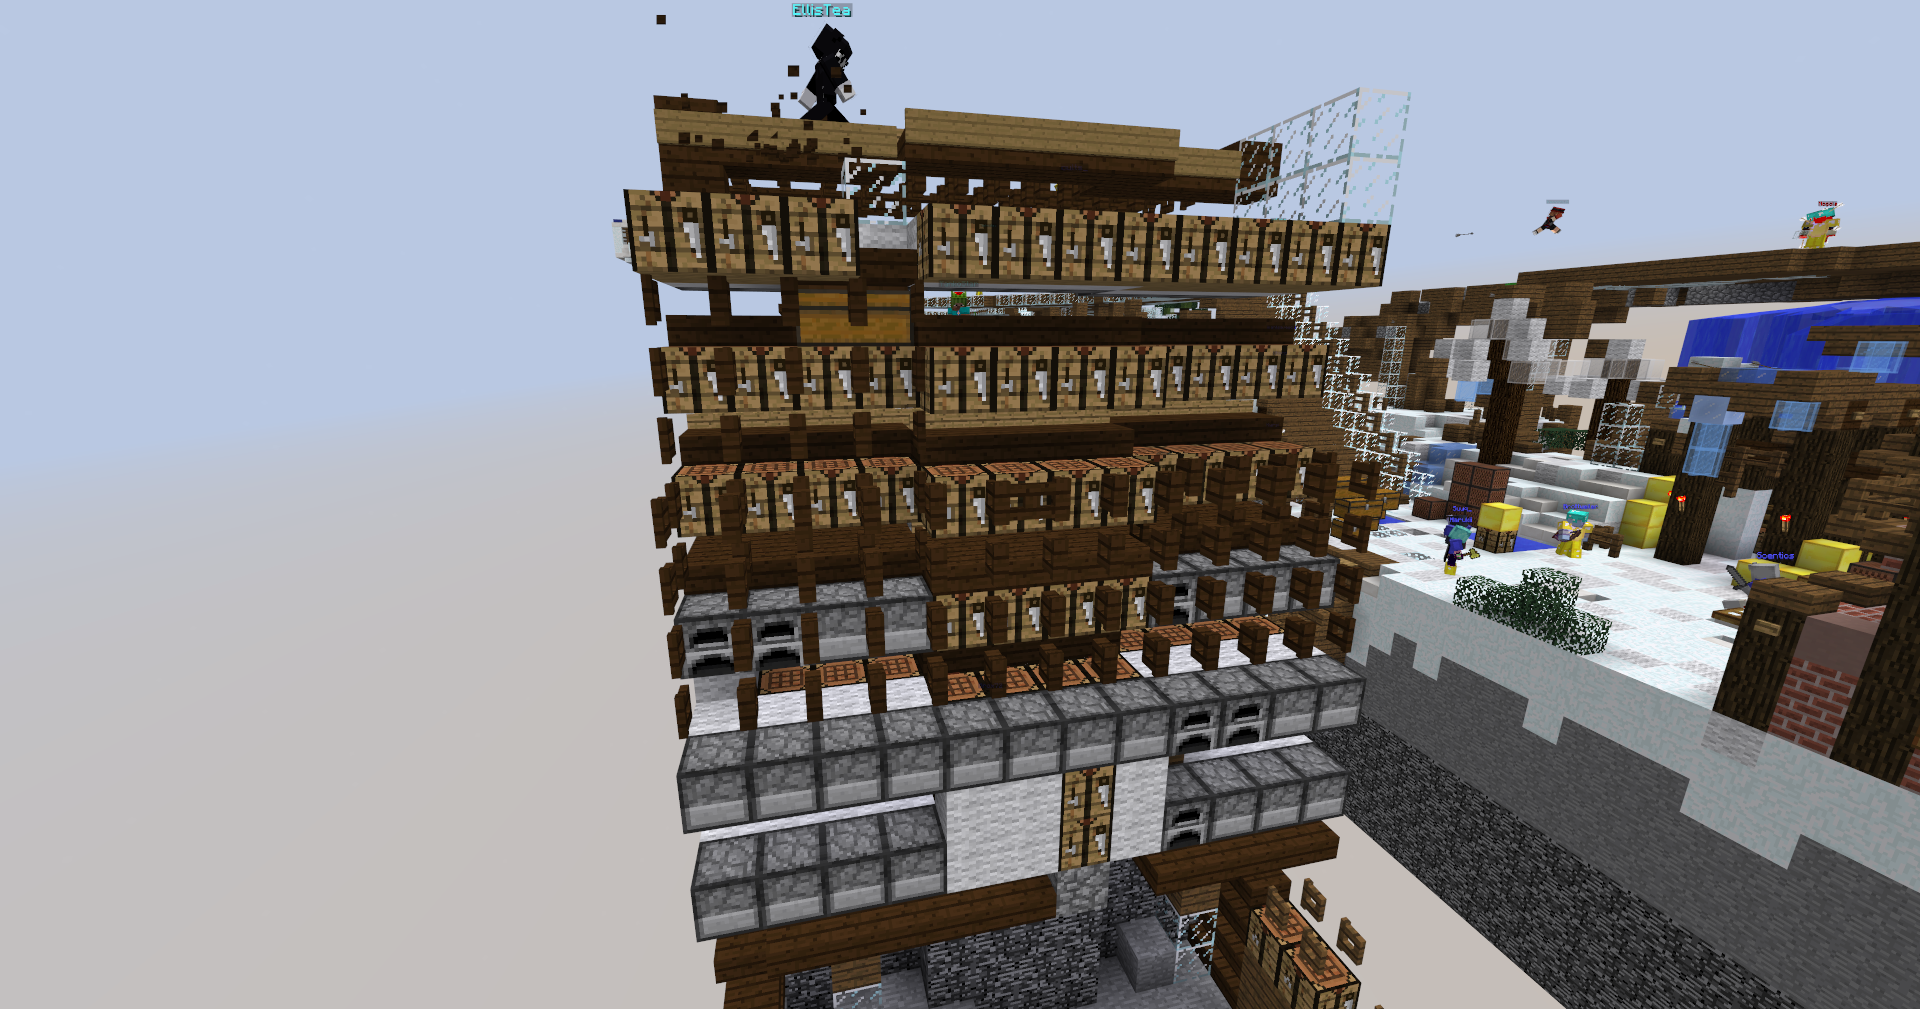
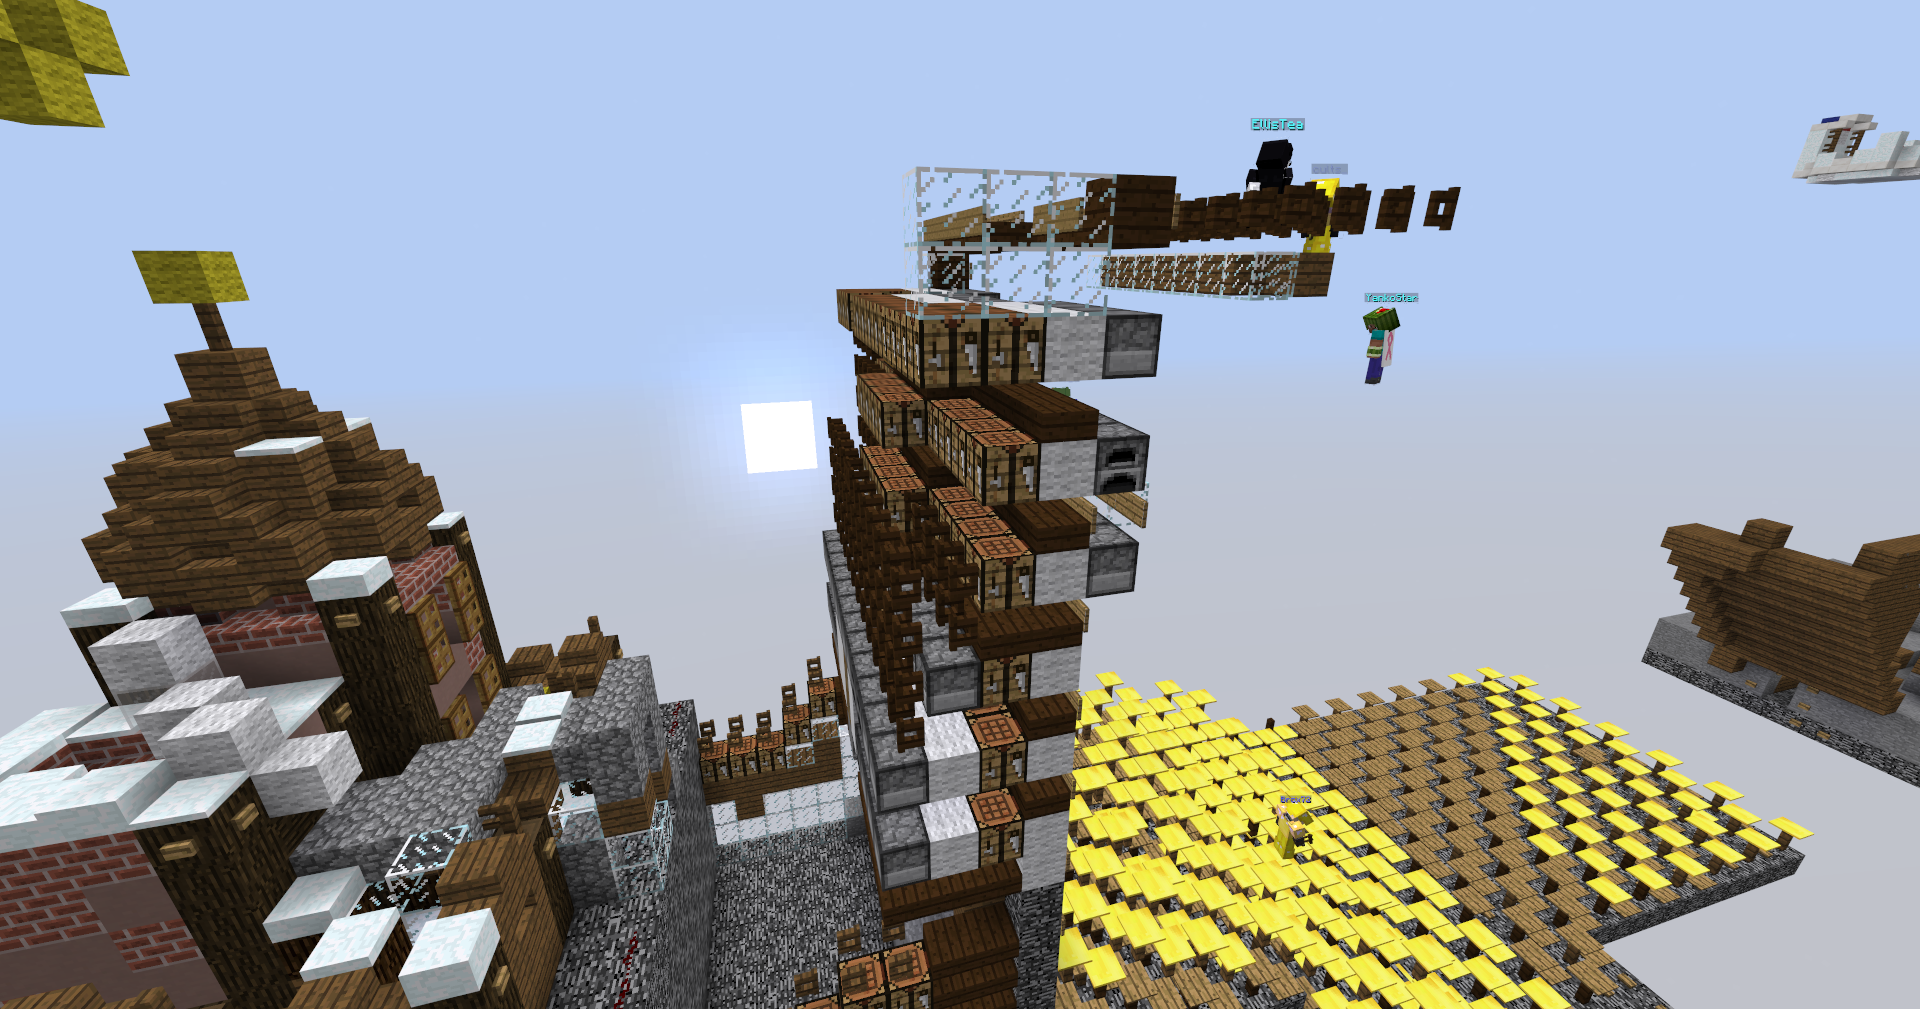
"On wall patterns"
There's a few "on wall patterns" we can make and they serve an important purpose. Namely, they usually prevent rushers from "blocking in" before they start breaking through the wall, because they're unable to place blocks on the wall; but there are also patterns that serve more purposes such as allowing snipers to shoot "blocked-in" rushers
Types of "on wall patterns"
-
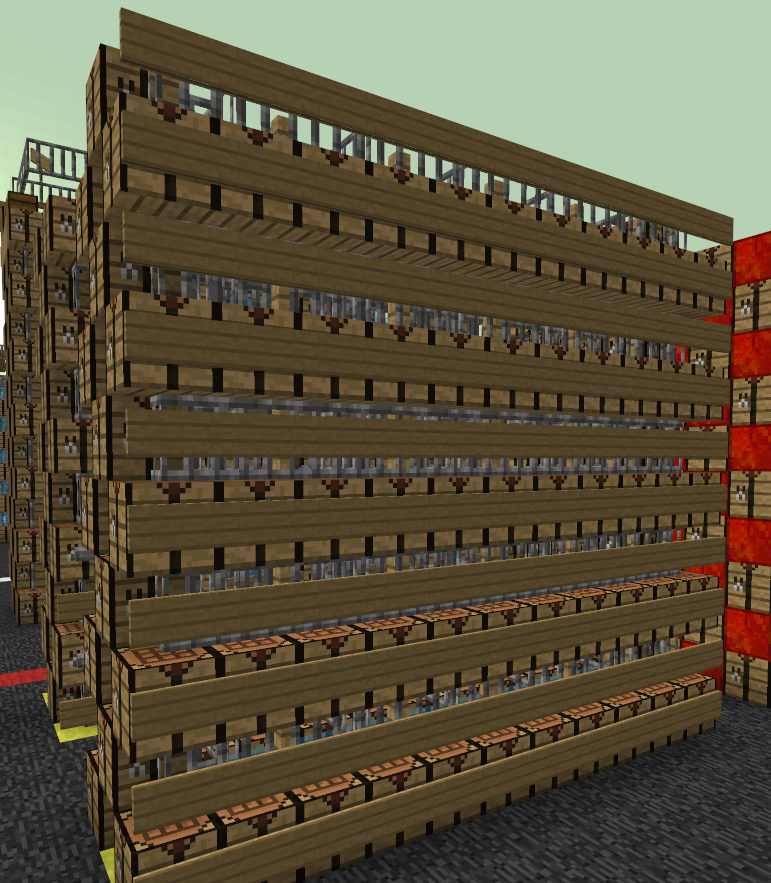
Sign pattern
The classic sign pattern, it's not much of a pattern since it's just signs, but it surely is something. It's not very good, because the rushers don't have to switch tools and signs are a pretty soft block, but it's not the worst :D
Popularized/invented by: Unknown
Resources needed: Signs, a wall

Images:
-
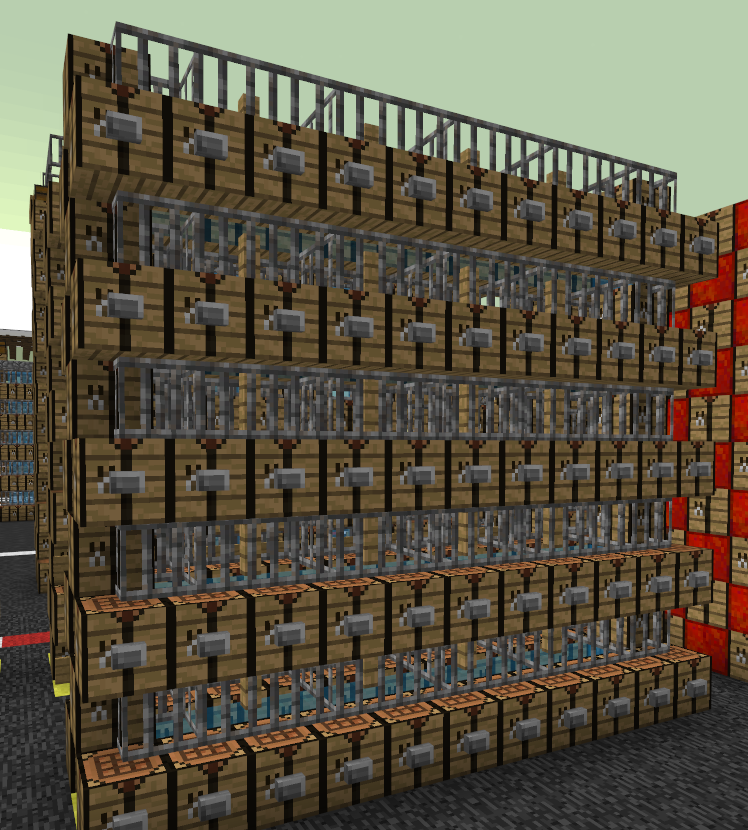
Button pattern
The classic button pattern, probably the worst pattern ever invented. The reason why it is so bad is because buttons can be easily broken with water. With a single water bucket you can destroy a lot of buttons, hence buttons should never be used alone, the next pattern is a nice way to bypass this flaw
Popularized/invented by: Unknown
Resources needed: Buttons, either stone or wooden

Images:
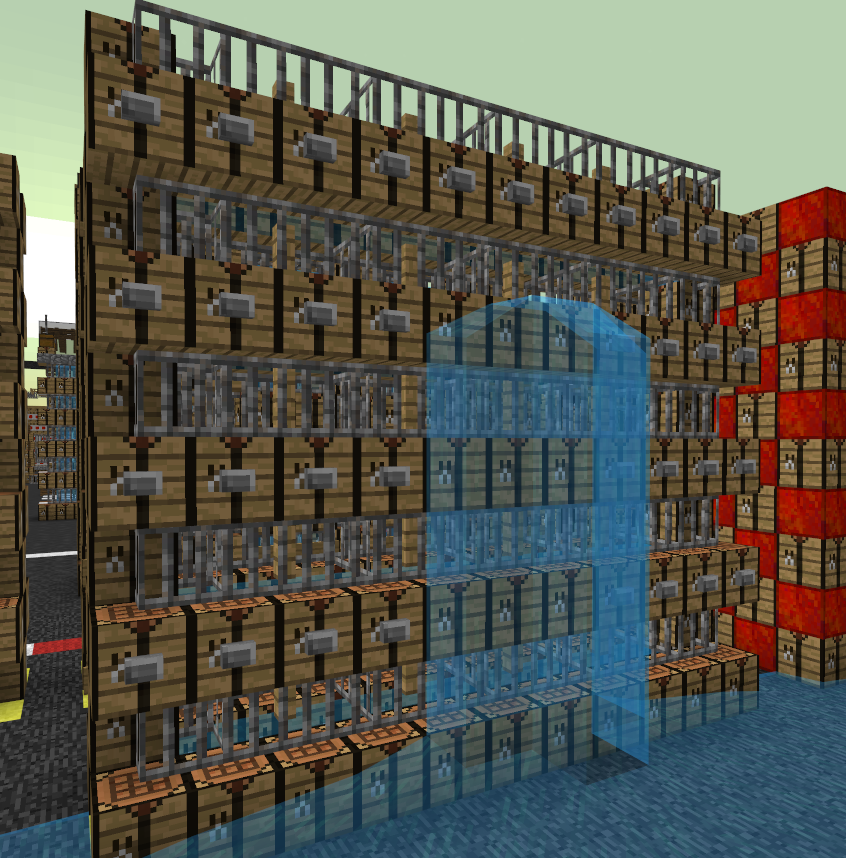
-
Sign/Button pattern
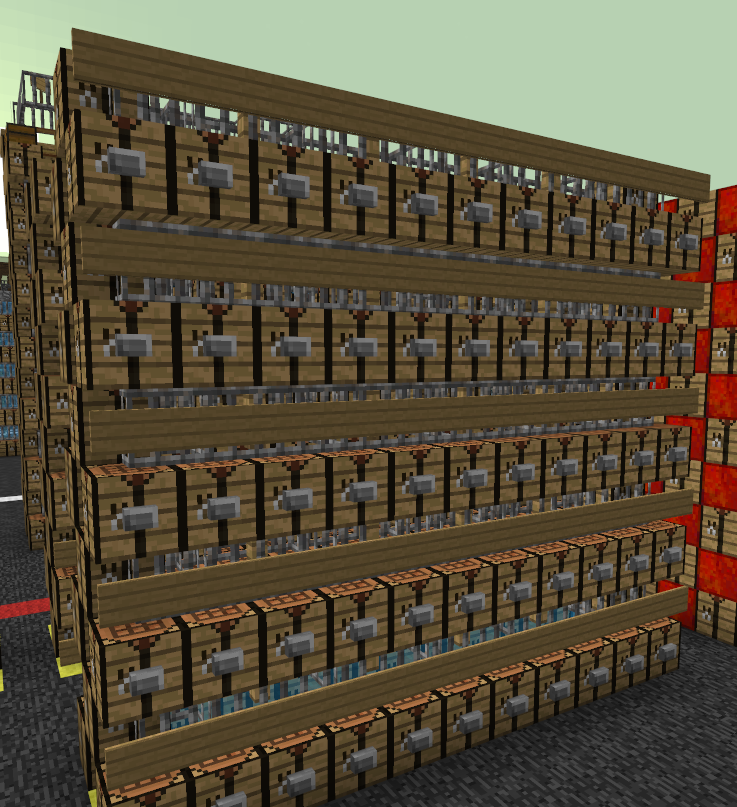
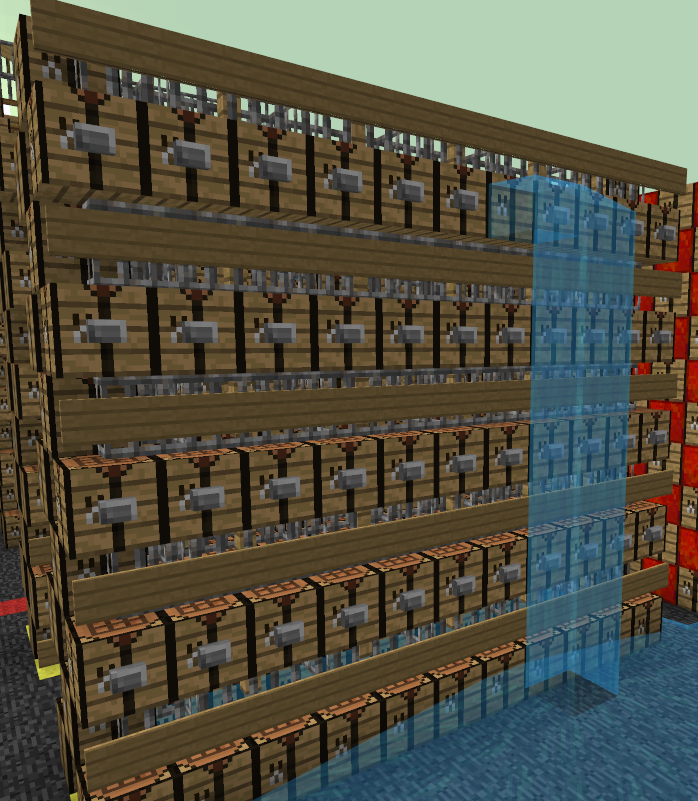
A combination of the two previous patterns. It's pretty good and low-effort, probably what you want to use in chill matches. There are better patterns for intense matches tho where the rushers' pressure is increased
This pattern requires the rusher to switch between an axe to break the signs and a water bucket to break the buttons and because of the signs they can only break one buttons with a single bucket
Popularized/invented by: Unknown
Resources needed: Signs, buttons

Images:
-
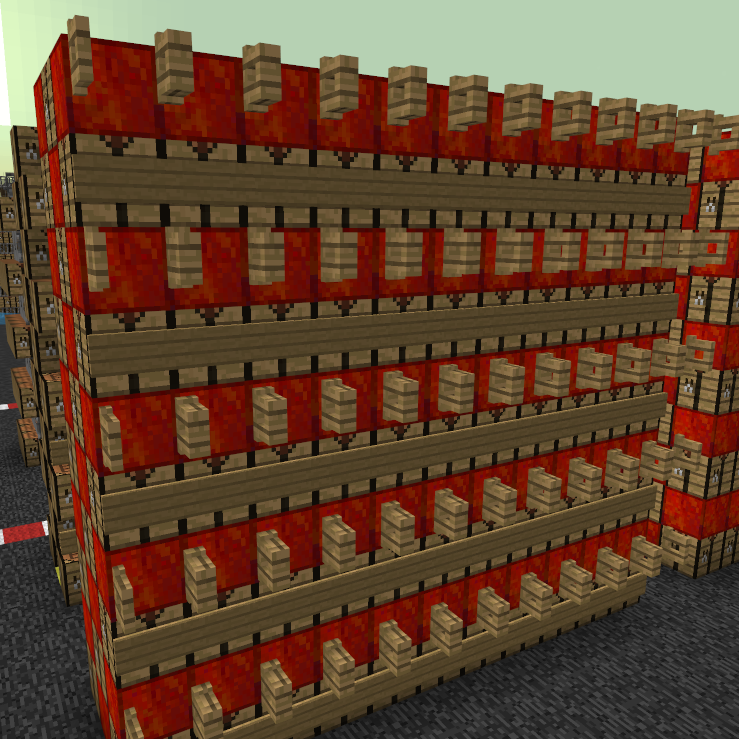
Sign/Fence gate pattern
I'd say this pattern is worse than the previous one, however if you have only wood to work with, it may be what you want to use, but keep in mind fence gates are more wood-intensive than signs (but harder to break). For 1 fence gate you need to use 4 planks, but for 1 sign you only need 2.1 planks
Popularized/invented by: Unknown
Resources needed: Signs, fence gates

Images:
-
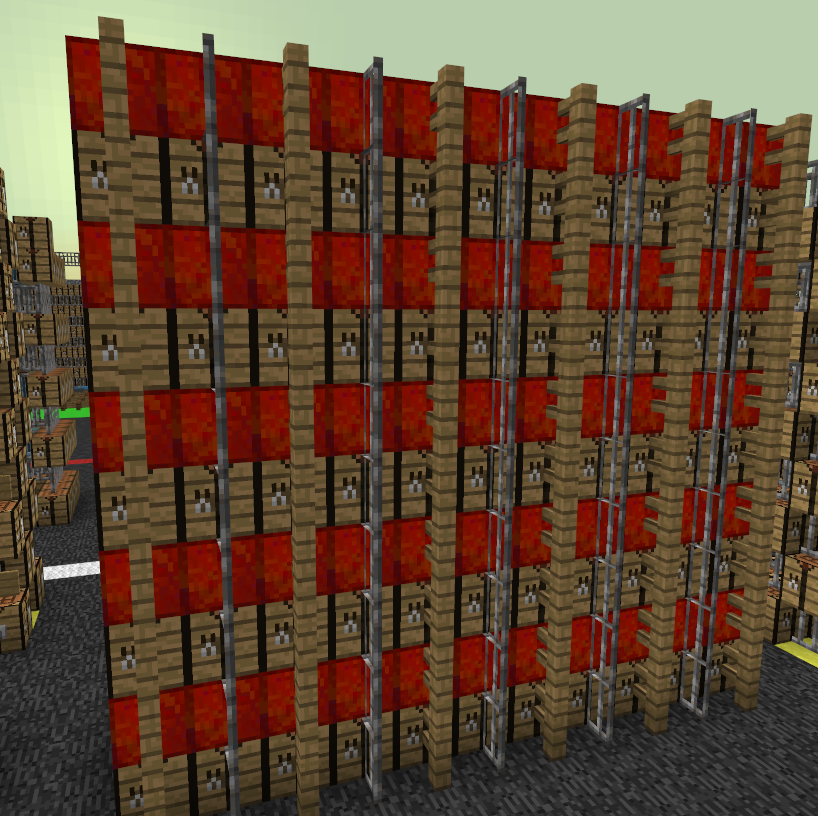
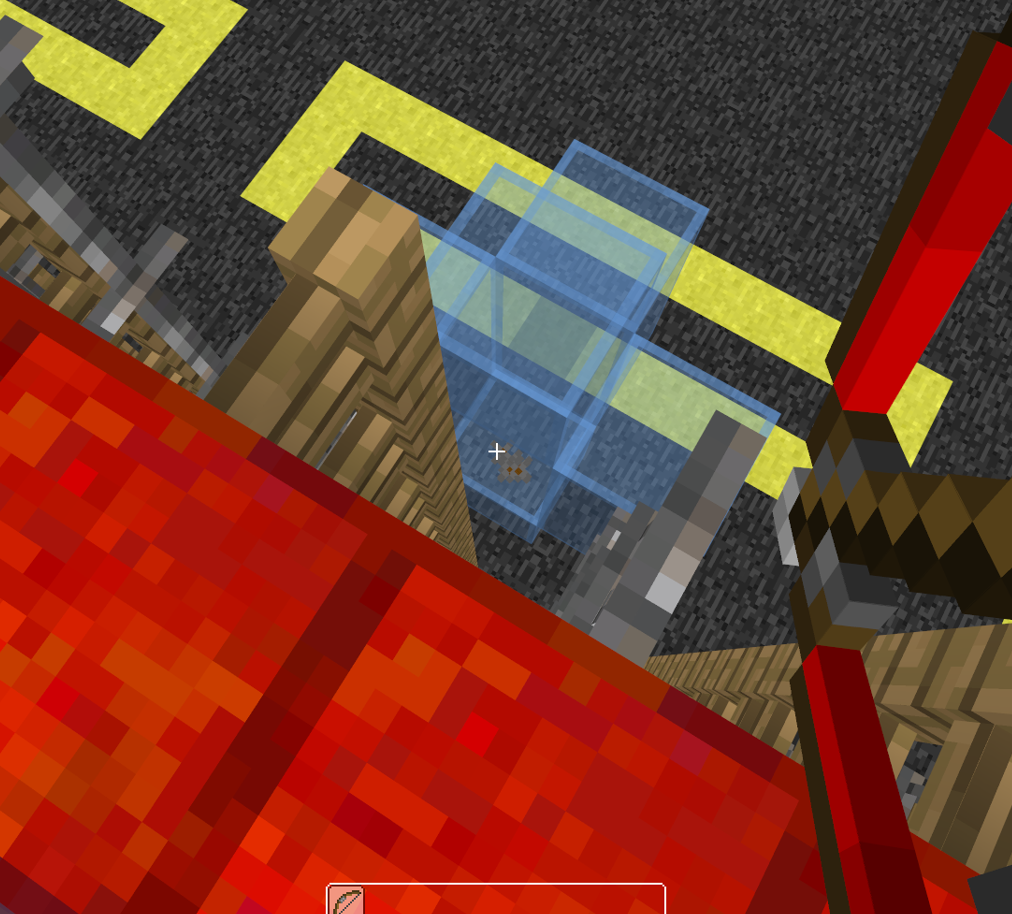
Fence/Iron bar pattern
This is probably the best on-wall pattern you can make, it's great for intense matches and if you want the match to last for longer.
This design is superior mainly because of 4 things:- Fences are higher than 1 block, so if they try to mine where the fences are, they'll have to break 3 fences instead of just 2
- Iron bars are way harder to break than buttons or any axe material and fences are second hardest axe material after crafting tables
- You can put signs or fence gates on top of this pattern to make it even better
- And finally, the most important - you can shoot the rushers even if they manage block-in, because of the space between fences and iron bars!
Popularized/invented by: Unknown
Resources needed: Fences, iron bars

Images:
-
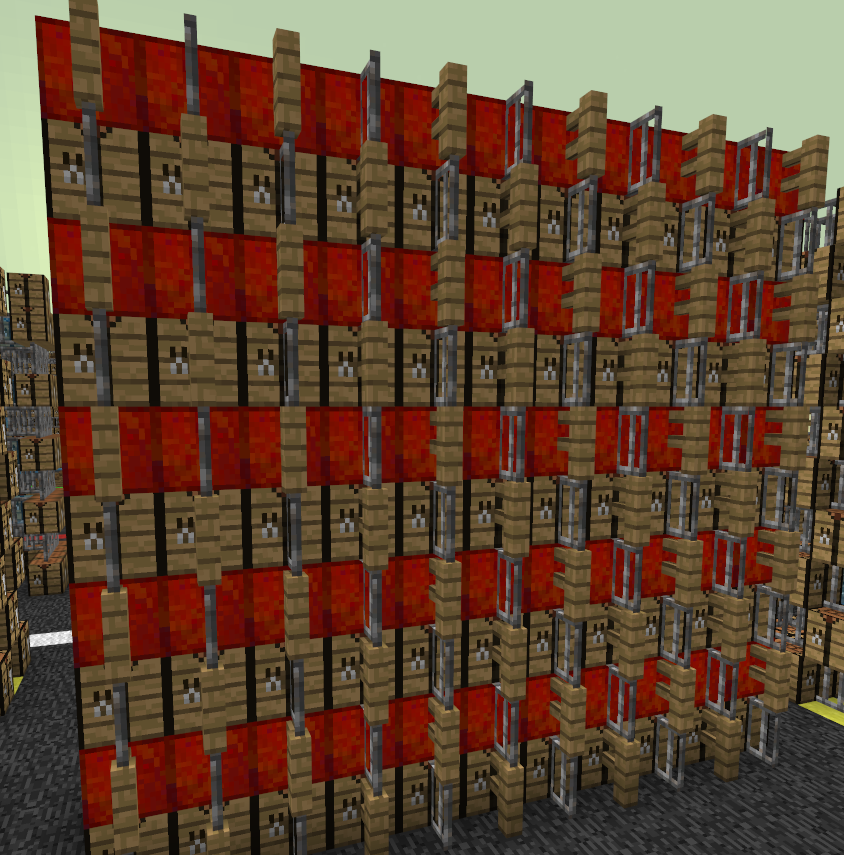
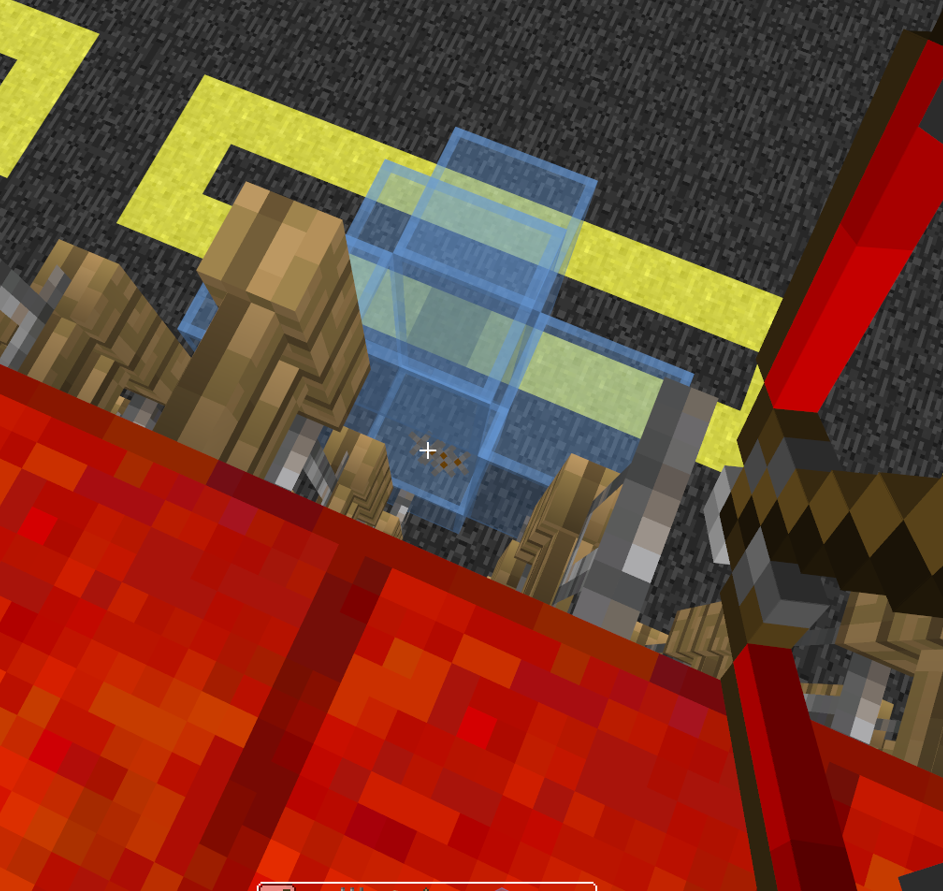
Fence/Iron bar pattern - Variant 2
The only difference between this pattern and the previous one is that the rushers have to switch tools, which is a nice addition and that the surface level on top is not the same, because fences and iron bars have different height and it may be a problem with some snipers' nest designs
Popularized/invented by: Unknown
Resources needed: Fences, iron bars
Images:
Side walls
Sidewalls are walls connected to your main wall located on the edges of your backpit. Their purpose is to prevent neo'ing, boating and minecarting around the wall, which are common rushers' strats
Where/how to build a side wall
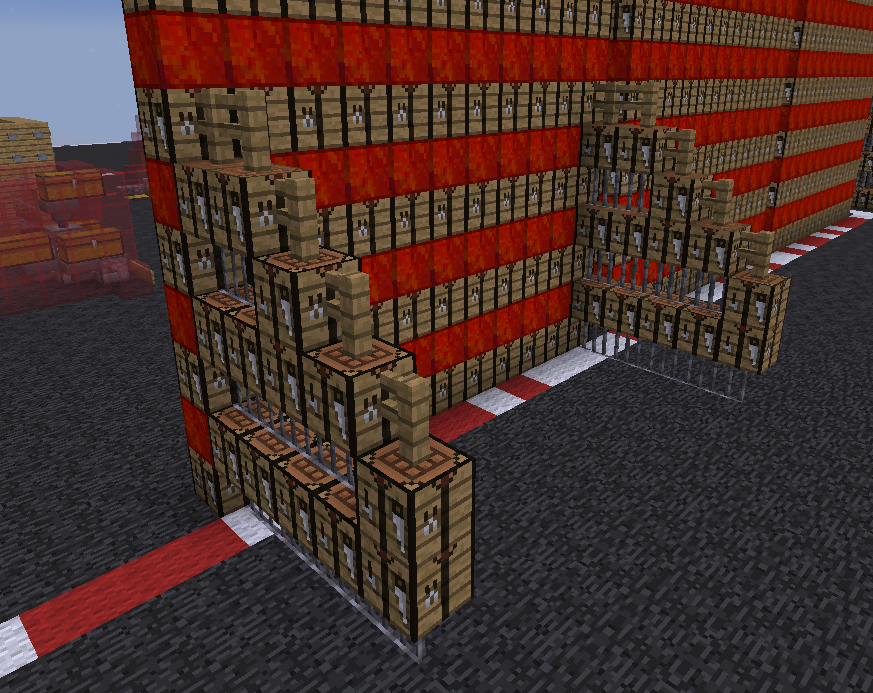
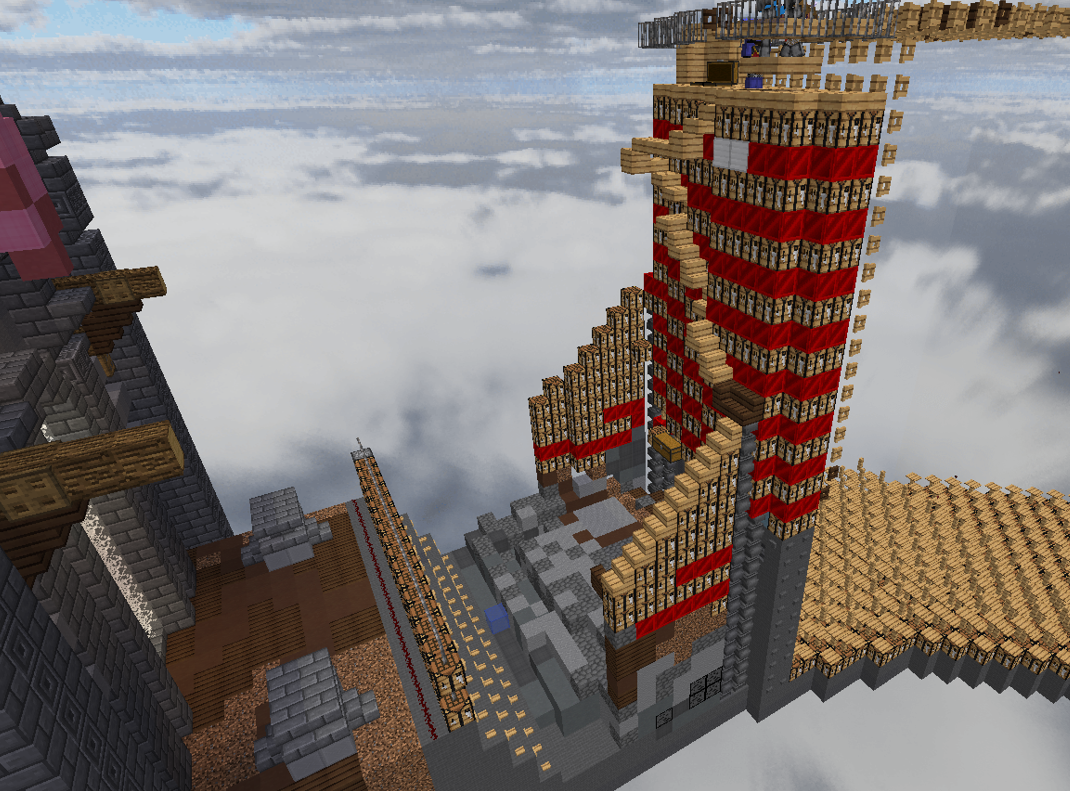
- The sidewalls should be built on both sides of your main wall in the backpit (screenshot below)
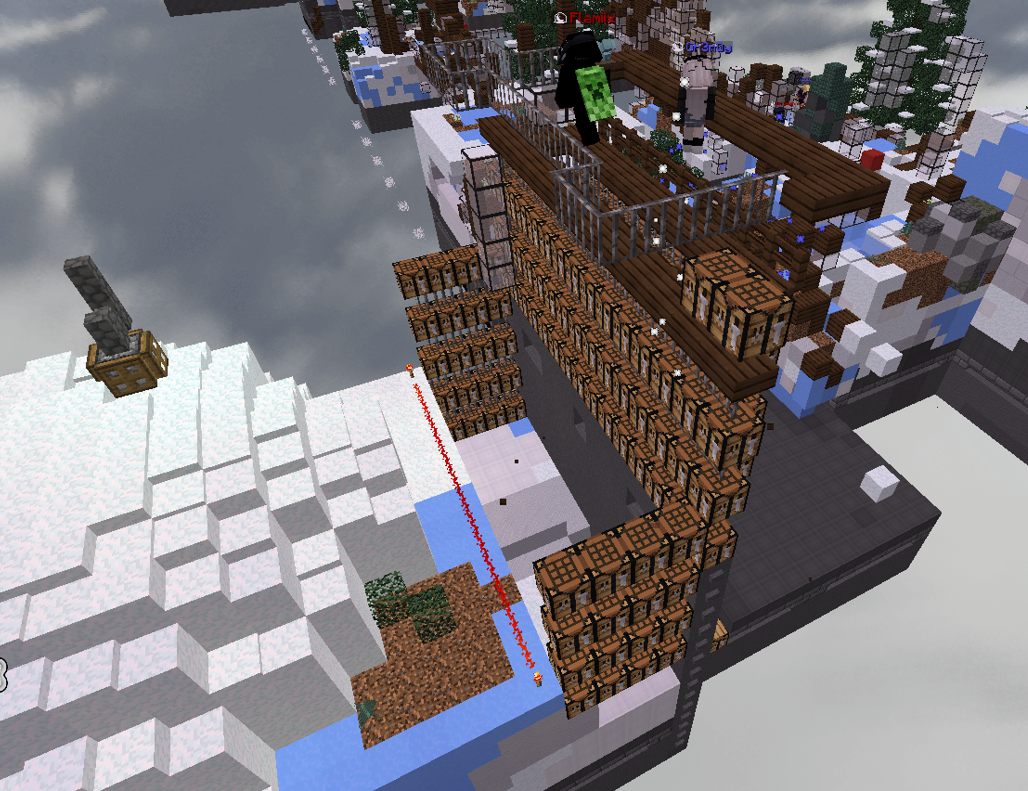
- You should always place fences on top of them, so the rushers can't boat on them (just fences, without plates or anything), unless your sidewall doesn't have two or more blocks placed next to each other on the top layer (second screenshot)
- I recommend starting with a layer of iron bars, because they're much harder to break than crafting tables (not only because of their hardness, but also because they're thinner) and rushers may attempt that in order to place a rail there and minecart around the wall
- Make sure your sidewalls aren't too tall or too close to the woolroom
- 6 blocks tall sidewalls are more than enough, no need to make them taller
- If you can jump to the woolroom from on top of your sidewall or place a boat there - it is bad
- Notice how the sidewalls I showcased are descending in height, that makes it harder to gain momentum while jumping towards the woolroom and makes the distance from jumping position to woolroom way longer, because it's the best to jump from the highest sidewall point and because there are two blocks on the top layer it's the only place where you can gain backwards momentum
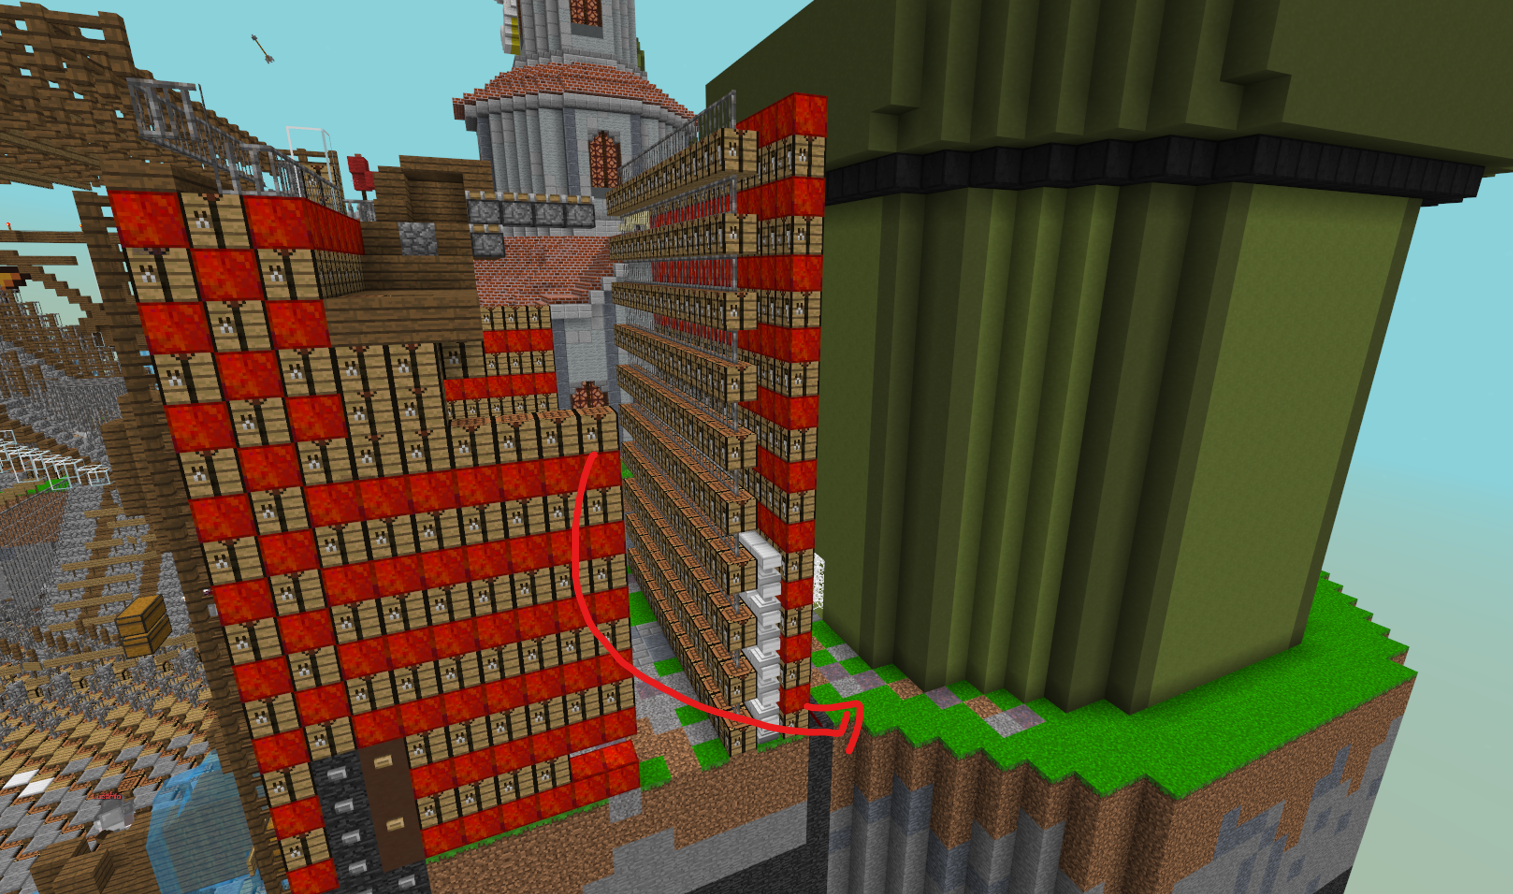
- If the backpit is really small, like in the third screenshot, just ignore the last two bulletpoints
Backwall sidewalls
This should be in the Backwalls section, but I'm not going to make
a subsection for something so minor when there's already a subsection for sidewalls
Of course, we cannot build behind the backwall, because it's our woolroom region, but there's one way to make a
sidewall there. What we need to do is get on top of our backwall, place rails there, put a chest minecart on the
rails and push it towards the woolroom. The rushers won't be able to place a boat where the minecarts are and
because they carry a chest, the rushers also can't sit in them